Hello Everyone, welcome to the uTry.It channel. This is Amy Tong. Today, I want to share with you this fun and adorable recipe. It's made with all-natural ingredients with no artificial coloring.
It tastes amazingly delicious and definitely Kids and Parents approved. Follow me to the kitchen and I'll show how to make these Strawberry Milky Lollipops. First, we'll need 1/2 a cup of freeze-dried strawberries. Place your strawberries in a ziploc bag and crush with a rolling pin, until they're powdery.
In a small pot, add 1 cup of sugar, 1/4 cup of unsalted butter, a 1/4 teaspoon of kosher salt, a 1/4 cup of sweetened condensed milk, and 2 tablespoons of water. Heat the mixture on low heat and stir constantly. When it reaches 248 degrees Fahrenheit, remove it from the heat. Next, we stir in 1/4 cup of honey, a teaspoon of vanilla extract, and the strawberry powder.
When the ingredients are well incorporated, we add in 1/4 cup of rice flour. I'll add the links to all the ingredients below this video. For the lovely pink color, I also added 1/2 a teaspoon of beet roots all natural coloring. I'll add the link to the tutorial below this video as well.
When your candy mixture is well incorporated, transferred to a small greased dish. Let the mixture cool in the fridge for at least one hour before rolling. Dust a little rice flour on a silpat, take about a tablespoon of your candy mixture, and roll it into an 6-inch log. Start from one of the ends of your candy and roll it into a coil shape.
Insert a lollipop stick until it reaches 1/2 way through the candy. Place your lollipops on a silpat and chill in the fridge for 30 minutes before serving. Next, let me show you how to make the strawberry shaped ones. Roll 1/2 a tablespoon of the candy into a ball.
Apply pressure to one end to make it slightly pointy. Insert your lollipop stick from the pointy end until you reach halfway through the candy. Slightly reshape the candy if necessary. Next, add your white sesame seeds all over the candy.
And here's a fun fact: Did you know that there are approximately 200 seeds on each berry? The good news is that you don't need that many sesame seeds on these candies. To make the strawberry leaves and stem, I used a little bit of green tea powder and mix it into the candy. When the color is evenly distributed, you can roll the candy into a flat disk. Then, cut the disk into small triangles.
Take five of the triangles and attach the flat sides together. Roll a small triangle into a log to mimic the stem. Place it on top of your strawberry and it's all done! I like to prepare a small cup of rice so your lollipop can stay up straight. These lollipops are so much fun to make and packed with strawberry flavors.
I hope you enjoyed today's video and give this recipe a try soon. Before you go, please click on the subscribe button and subscribe to my channel. This way, you won't miss any of my future tutorials. Happy cooking and I'll see you all next week!.
Welcome to How To Cook That, I'm Ann Reardon
and today we are making our own candy lollipops, spirals, candy with a pattern on the inside
and sherbet filled candies. What you'll need to make these is some sugar,
glucose syrup, water and some cream of tartar. Put the sugar and the water into the pan with
the glucose syrup. Place that over high heat.
If you've got any sugar crystals on the sides
of your pan then you just want to wash those down using a wet pastry brush. Turn your oven on to 100C or 210F and place
a tray lined with non-stick baking paper in to warm up. Let your sugar mixture boil until it reaches
150C or 302F. Turn off the heat and stir through the cream
of tartar.
Now we will follow this same basic process
for all of our candies. For the sherbet filled candy add yellow food
colouring and stir it through. And then pour that into a warm tray that has
been lined with baking paper. Now to protect our hands from the heat we
are going to use ..
Silicone gloves but these are not going to be enough so we are also
going to use cotton gloves underneath them. Oh, and let me show you my nails while we
are here - these are one of the designs in my own line of wraps that I'm doing with Jamberry. These ones are called YUM and they have cute
little icecreams on them and I'll link to them below. For those of you who asked last week what
are wraps? They are bit like stickers made out of nail
polish, and you use a little bit of heat to stick them onto your nails.
And they last up to few weeks. We are going to put these ones through some
rough treatment today with heat and gloves and in and out of gloves. Fold in the edges towards of the hot sugar
towards the centre and then lift it up and begin to pull it out and then fold it back
in. The more you pull it, the more shiny and opaque
it becomes.
If you want it to be transparent then don't
pull it much at all. Place it back in the tray and flatten it out
as much as you can and then put it in the oven to warm up again. Now that it's warm you can stretch it into
a rectangle. Now usually when chefs make this sort of candy
they have a heat lamp shining on the candy that keeps it warm while it's on the counter
so you don't need to keep putting it back in the oven, but they are super expensive
so this is the way to do it home.
Place a generous amount of sherbet down the
centre of your rectangle and then bring the sides up and around to cover it. Push down each of the ends to seal in the
sherbet. Squeeze it to make a cylinder shape and then
place it back in the oven for about 30 seconds to a minute, just keeping an eye on it because
you don't want to overheat it. Once you can just stretch it when it's soft
enough to stretch, pull the candy to make a long snake.
Working quickly before it hardens make firm
indents along the candy so that you are sealing in the sherbet into each one. To make lollipops we'll need a few different
colours in the one batch. So place strips of foil along the tray and
then cover it in baking paper. Prepare the candy just like we did before
but this time add a few drops of essence, I am using a fairy floss flavour.
You can buy all different ones and then just
flavour your candy. Pour some hot mixture into each of the sections. And then to get you pan clean all you need
to do is fill it up with water and leave it to soak and the sugar will just dissolve off. Add food colouring to each section in the
colours that you are after for your lollipop.
And then using scissors, cut along the baking
paper so you can work with one colour at a time. Fold it into the middle and then stretch it
until it becomes opaque. Make it into a snake and then set it aside. Repeat that with the blue.
And the red
And the yellow and the clear one as well to make it white Then warm them slightly again in the oven
and place them together to make a cylinder and squeeze them so that they stick together. Cut the cylinder in half and leave some to
keep warm while you stretch the other half. Twisting as you stretch so you get that pretty
pattern. Take a lollipop stick and poke it into one
end then wrap the mixture around and around pressing it into place.
And you can keep going to make your lollipop
as giant as you want it to be. To make the spirals remove the mixture from
the heat and add in flavouring, for this one I am using musk. Split it into two sections and add red colouring
to one half and blue into the other. We are going to take the blue half and pull
it and stretch it to make it opaque but with the red half we are just going to leave that
and not pull it all.
Keep pulling the blue half and twisting it
so that you can see there the more we pull it and the more we twist it the more opaque
and shiny it becomes. Don't pull the red half just cut it in half
to make two long cylinders. Pull the blue into two long snakes too and
then stack them up to make a square. It looks a bit like toothpaste.
Squeeze them together to round it out and
then cut that into two. Working with one half pull it and make it
thinner into a nice thin long stick. And you can slice it while ti is warm to make
individual candies OR to make the spirals, wrap it around a thick skewer. Once it is all the way to the end you can
just pull the skewer out and leave those to cool.
See how the pink there is totally transparent
because we didn't pull it and the blue is opaque. The other thing you can do is roll some of
this mixture into a ball and make round lollipops and just put a stick in one end. And you can make as many different candies
as you like just by flavouring and colouring each one differently. And now for something which is going to be
hard to do without a heat lamp but I reckon we can do it.
We're going to split the mixture into three
and colour some red, leave some plain and colour the last section green. Pull each of the colours just like we have
done before to make them opaque. And then stretch the red one to make three
long snakes, return one to the oven to warm up. And once it is soft and pliable, place it
across the top of the two red snakes and shape it at the top into a point.
Add some white along each side of that triangle
and then flip it up the other way and add a strip down the centre on the top. And then finally add more white so that the
red is completely covered. Warm your green, and stretch it out and add
it over the top of the white so that it goes all the way around. Now you are going to need to place that back
in the oven to warm it up because those two red ones are quite cold by now.
And once it's warm you can just stretch that
candy out into a long strip. Now to cut it without it shattering it needs
to be quite warm so return it to the oven until you can bend it like this. And then quickly using a sharp knife, chop
off pieces to reveal the little heart inside. Subscribe to How To Cook That for more crazy
sweet creations, Click here for the recipe and here for my
chocolate truffles and here for my YouTube channel.
Today on Wondermint Kids, my friend Mia & I
are going to make super easy and very beautiful Chocolate Lovely Pops! To start, you'll need plastic molds, lollipop
sticks, melted chocolate chips... And assorted goodies that you like. I have Rice Crispies, sea salt, Mini M&Ms,
almonds, coconut, and sprinkles. But you can use whatever you like! The first thing you do is put two pinches
of your favorite goodies into the mold.
Go ahead, Mia. If you put too much there will be no room
for the chocolate, and everybody likes chocolate! Then lay your stick into the mold. Mia, you need it to touch the very bottom
of the shape of the stick, and it has to be sticking out, too. Okay, now we are going to pour our chocolate.
We're going to pour enough to cover your goodies. Sometimes, it might be a little bit messy,
but it's still easier to do with a spoon. It's okay if it gets on the edges of your
mold, because you won't see that part when you take it out of the refrigerator. Something smells good! Mia, you do one.
Yummy! Maybe you'll spill it on your finger. You already did! Sorry! It will be very pretty when it turns out. Now you can lay your molds into the refrigerator for about one hour. And these are what they turn out to look like! Here you go, Mia, you can pick one.
To get this recipe or more Wondermint Kids
fun, visit our blog, WondermintKids.Com Yum!.
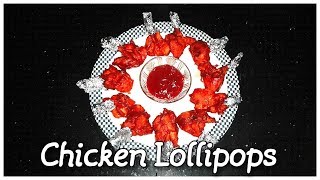
Hai, I'm BensBQ and today I'll show you how to make chicken lollipops. So stay tuned. After cleaning the chicken, you do that in water, brushing with a lemon and then you make it dry with some kitchen paper. It's time to cut our drumsticks.
First you'll remove the top of the drumstick. If there's a small piece of tendon, cut it then away. There's still a very sharp bone to the large bone that we try to get away. And so you'll make chicken lolli[ops.
And after we're cutting the drumsticks into this lovely lollipops we're going to seasoning. I use a dry rub. I used it earlyer on the chicken and I like it but you can make also your own rub. It's what you want.
Than we take a aluminium bowl. With a layer of butter. And when we've the right temperature in the barbecue let's say 180C. Or 360 F.
We added some wood chips soaked in water, apple it's time for the chicken. And when we have reach a core temperature of 70C or 158 F. We're going to dipping the lollipops into a barbecue sauce. Below in show more you can read how to make this barbecue sauce.
Now we let the chicken for another 15 minutes on the grill. Then we added some barbecue sauce. Fresh parsley. A few slices of lemon.
And finally some sesame seeds. And of course we'll taste this beautiful, looking chicken lollipops. So, let's have a try. Wow...Man oh man.
You taste first the sweetness of the barbecue sauce. And then you taste the spicy rub. And the smoke, apple wood. Awesome.
This is fabulicious good. I'll see you next time with BensBQ. And subscribe for free. Cheers, BensBQ..
Hello friends. How are you all? I hope that you all are fine Once again I welcome you all to my youtube channel
shahidaig.Com Today I am going to tell you how to make chicken lollipops Lets start with the ingredients First of all we are 1 kg chicken wings. If possible ask your butcher to make them or buy raw ready made chicken wings After this we are having 1 tsp freshly crushed black pepper, 1/2 cup all purpose flour and 2 tbsp corn flour Next we are having 1 tsp tomato sauce Then we are having 1/2 tsp soya sauce. Do not add more than that otherwise our lollipops will turn black After this we are having salt (according to taste), 1/2 tsp garlic powder, 1 pinch orange food color In the end we are having oil for deep frying, some silver foil cut into pieces and water as required Before we start let me tell you I am having my cooking blog by the name shahidaig.Com Its link is given below in description Just check it out and subscribe there also Lets start our dish First of all take the chicken wings and add all the ingredients (except cooking oil) into it Mix them well and after that we will add little water into it.
We won't form a batter but a paste for coating All the ingredients are mixed perfectly. Cover this bowl with a lid and keep it aside for 15-20 min. After that we will deep fry them Now take a cooking pan and put it on high flame. Add oil into it and let it heat.
Take a little marination paste onto your finger and drop it into the oil. If it starts to flow, our oil is perfectly hot for deep frying. Turn the flame to medium and place the marinated chicken pieces into the hot oil one by one very carefully When their color changes to dark brown, we will remove them from hot oil Whenever hot oil is involved always cook carefully. Safety should be your top priority After frying for some time our chicken lollipops are ready.
Remove them and keep on a tissue paper I am now going to wrap them in silver foil pieces Our chicken lollipops are ready They are very delicious.Do try them and let me know whether you like them or not Do comment, subscribe, share and like this recipe Will meet you soon with something new Till then take care. Bye.
When I offer this dish to my guests, they often wonder what these lollipops are madeof? These are actually honey chicken wings shaped as small thighs. Separate the 3 parts of the chicken wings Remove the tip. We will give the two other pieces the lollipop shape. Start with the first segment: starting from the least fleshy end, detach the flesh to reveal the bone.
Push the flesh towards the other end. The second segment contains two bones, remove the thinest. For this, separate the two bones on one end. Untie the flesh and remove this little bone.
Then push the flesh towards the other end
along the remaining bone. To make the chicken marinade, crush a clove of garlic peel it, chop it peel the ginger grate it take 1 tsp Then add
The salt The pepper The sugar The honey The oil The light soy sauce The dark soy sauce mix all together cover and leave it in the fridge at least
3 hours, or better overnight. Mince the green onion mix the marinade before cooking. Pour it in a pan, all the cooking is done
over low heat.
Cook for five minutes with a lid. Then mix, put the lid back on, cook for another five minutes. Continue cooking for five minutes without
a lid and mixing from time to time. Without a lid, the sauce evaporates and allows
the wings to caramelize.
Sprinkle some green onion Beware some gourmands may finish the dish before others have enjoyed it. Bon apptit! Thank you for watching and sharing my video. See you at the next homemade dish.